

Hello Dear Reader and Writers joining me again today!
Last week I gave a brief introduction, mostly listing out some tools that will be useful and hopefully explaining the purpose of these blogs. Today I’m going to talk about how to set up a Bookshelf area on your Facebook page. This is a great resource for readers to have yet another one stop shop for books, series info and when the next book is coming out.
Check out an example here, using my Facebook page Bookshelf: http://www.facebook.com/Sidney.Bristol.Romance.Author/app_208195102528120
Now, how do you do this?
Let me pause here to let those who struggle with tech and social media, I am not the most tech savvy person out there. I learn a lot through trial end error and finding weird workarounds to things.
For this you’re going to need:
- Images of your bookcovers
- Links to your book information
- Retailer images or buttons
- Links to the retailers who sell your books
- A host for your images
- A HTML editor, or something that can write the HTML for you
Don’t know what all of this is? Don’t worry, we’ll walk through it.
1. Install the app on your Facebook page.
Search Facebook for “Static HTML”. There are several options, but I suggest the one pictured below. It doesn’t require https:// and allows for easy copy/paste.
https:// refers to secure websites, which not all sites are. This is important later, where we discuss how to get your images onto the page. For now, search for the app that you wish to use. I merely suggest the one below and show how to use it.

Install the app and assign it to the desired page. This should happen in the instal process. If not, go to your Account Settings on your main Facebook profile, not the page. In the Aps section you can manage the particular ap you have selected.
2. Setting up the app.
Once it’s associated with a page, it will be an option to add to the navigation. To add it, go to the four primary blocks on a page and click the setting cog below the banner, pictured below. You can assign it to a square and begin the editing.
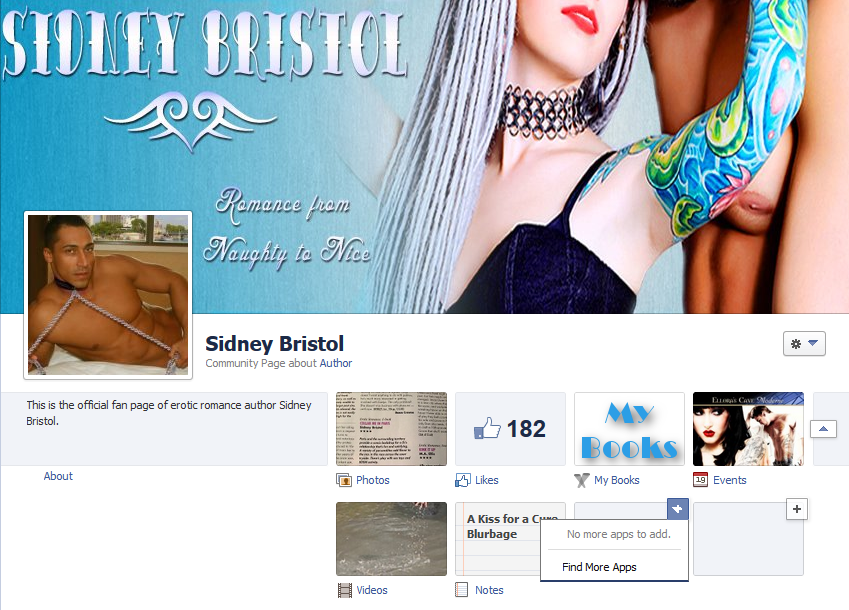
The ap I’m using is pictured above with the My Books image. I’ll explain later how to make it look different than the default ap graphic.
Go into the ap by simply clicking the square. It will take you to the new, static HTML page, which won’t have a lot on it. There is a Settings link in the right, upper hand corner. Click this.
You will be prompted to authorize the ap. You will have to authorize the ap every time you go into it. It’s just the annoying part of the game. Your ap is now set up!
3. The HTML monster.
This next bit is going to look intimidating, but it isn’t. Below is a quick recap of the settings before I get into building the HTML. You can use the selections I’ve made as far as the radio buttons go to set up your ap, or chose your own.

Now on to the HTML Monster bit.
HTML is what many websites are created with. It’s a special language for webpages that allows things to appear pretty. Now, I’ve taken a few HTML coding classes and I still cannot do more than a few basic things if someone gives me a whole page of HTML. But you don’t have to speak HTML to create it! This is where my lazy, problem solving self muddles out the easiest method for me to create my HTML.
My secret?
Any blogging platform will let you create a page. WordPress, Blogger or even Word. I would caution against using Word though. I’ll explain why.
The handy part of using WordPress or Blogger to create your HTML is that you can upload and host your images to the Media sections and not have to worry about a third party host for your images. Using a blogging platform that allows you to see your HTML will make this the easiest possible.
Should you chose to use Word to code your HTML, you will need a third party host such as Photobucket to host your images. For the sake of simplicity, I won’t explain this process here. If there’s interest in that, I’ll explain it in a different post. I would prefer to not confuse people.
Now comes the fun part!
In Blogger, WordPress or your preferred platform, create a new page.
((I suggest a page over a post because I’ve saved it to update my Facebook Bookshelf later, and as a post it will get lost. As a page it has fewer pages to shuffle through to find it.))
Begin laying out how you want your Bookshelf to appear to readers. If you want just book covers with links to a page with more information on your website, or have it all on the Facebook Bookshelf is up to you.
If you would like to use retail buttons, find some you like, or save these and use:
Now, I use WordPress, which I will use for this example. I would like to add here that I use a fancy WordPress plug-in that makes my editing options more robust than what comes in a stock WordPress or Blogger. You can still organize your page with the tools at your disposal.
I suggest linking every picture back to a page on your website with more information about a book, giving all the buy links possible and take each opportunity to link back to your website. The Bookshelf on Facebook will help get your books in front of readers, but you still want to promote yourself, your website and your brand. That doesn’t ensure that readers will go to your site, but you can’t make a horse drink water either.
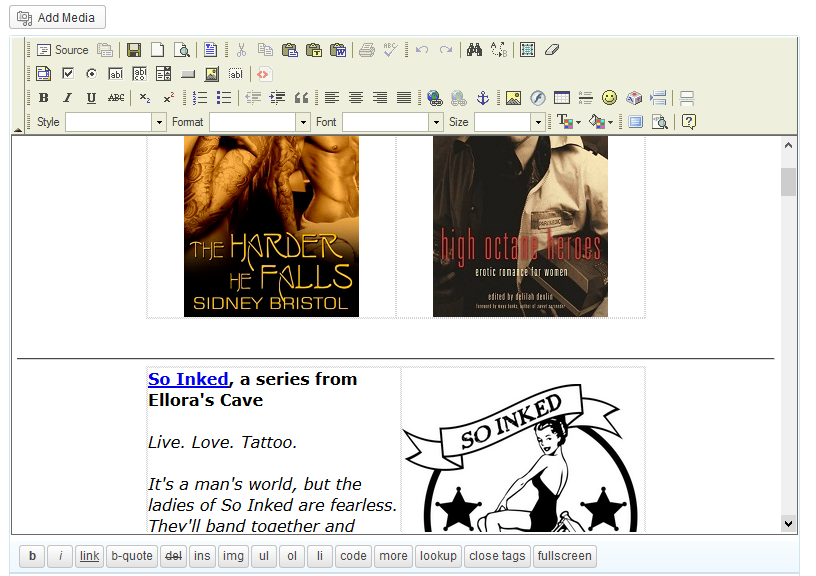
I suggest previewing the page every so often so you see how things will be appearing once you’re finished. I discovered that my books needed some sort of divider between them so the information didn’t looked squished. I solved this by using a horizontal divider and a divider graphic depending on if books were in a series or separate genres. I also decided that I wanted my retailer links below the book information, so I adjusted my page accordingly.
Once you have the page displaying how you want it to on your site, it’s time to grab the HTML code! There should be a button either above or below the text box you’ve been working in that that says Source or HTML.

Copy all of that mumbojumbo. Every line of it. The easiest way is to click inside the box and hit CTRL+A ((the shortcut for selecting all)), and CTRL+C ((the shortcut for copying what you have selected)).
Now, go back to your Facebook page ap and paste all of that HTML into the HTML box. ((You can use the shortcut CTRL+V to paste all the information you’ve copied into the box))
Save it and go look to make sure that it shows up correctly.
4. Custom tab image.
To set a custom image, you need to create one that is exactly 111px wide and 74px tall. You can create this in paint or another graphics program. I use GIMP2, a freeware image program that offers a few more options than paint. You could also use a more professional program like Photoshop, but I don’t have that.
I created an image that was 111px by 74px in GIMP2 that fit my color scheme and style.
Go back into the ap, and below the HTML box, which should now look something like a Christmas tree with all the green, red and blue text. Under this box is an option to Change Tab Image, click that and make the changes. You can also change the text that will appear below the box. I chose My Books, so it reiterated what the graphic said.
Here’s a few images you can save and use if you don’t have a graphics program:
 |
 |
 |
 |
 |
 |
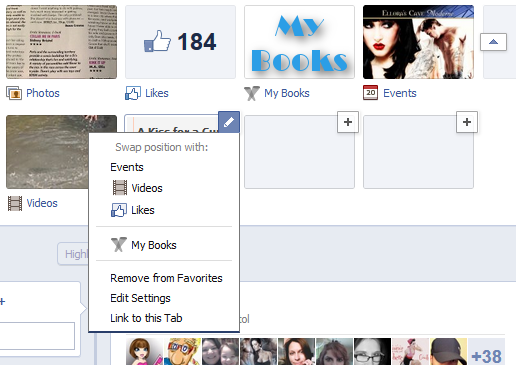
5. Setting the Bookshelf position.
To set the books tab on the top four rows, expand all of your aps on the Page. Click the + sign on the square you want to change. Chose what you want to swap positions with. You can only have four aps on the top row, so chose wisely.
You should now have a fully functional Bookshelf on your Facebook Page.
I hope this has been helpful. If you have questions, please let me know. I’m sure I can be more specific in areas.

Great post, Sidney! Thank you so much for sharing and giving all the step-by-step instructions. You rock! 🙂
Karla Doyle recently posted..Release Day for Body of Work!
Hey, I do these kinds of things for work so it was easy enough to blog about! Hope it helps.
Sidney recently posted..Facebook: Setting up a Bookshelf.
Thank you for this. I am slowly getting R. C. Graham’s page done on Facebook, and this will be a big help. It’s taking time, of course, but it will be worth it in the end.
angel Graham recently posted..Win a Free Copy of Ropes & Roses by Sharing Discovery…