

I decided after using two different Static HTML aps on Facebook that I much preferred the ap produced by Woobox for Static HTML. This was the first one I used in the setting up a Bookshelf tab.
1. Setting up another page using a previous ap.
To add a second page with the same ap, there are a few ways to do this. The easiest way I found was to do the following:
- View the Bookshelf tab, if that’s the one you created with the Woobox Static HTML ap.
- Click on Settings in the top, right hand corner. Should be a little hyperlinked text.
- Approve the ap.
- You should now be in the full editing window, complete with the HTML editor.
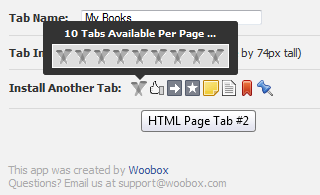
- Scroll to the bottom of the ap where it says, "Install Another Tab" as seen in the screen shot below.
- Select the crossed light beams and install the HTML Page Tab #2, or #3, #4 or however many this is for you.
Your new tab is now ready for editing!
2. Social media buttons.
I’m going to take a bit of a right turn before we code our HTML for this tab to talk about social media buttons. These aren’t a necessity, I just like them because they’re cute. You can ignore this step if you would prefer to use some images you have already or others or just want to use text.
I really dig social media buttons. They can have a super fun look to them, so if you chose to go a graphic, there are a lot of cute, professional or artistic options out there. One of the limiting factors for me as an author is that I really want to link to Goodreads and there haven’t been as many button packs that include a Goodreads button. My preferred package is one made by Jurgen Appelo posted on Flickr. He just asks that you include a link back to his site: http://www.noop.nl/
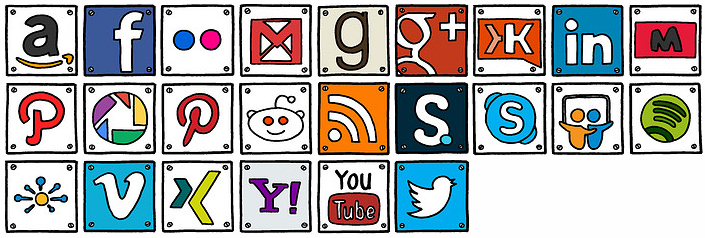
To download the individual images from flickr it’s a little obnoxious.
- Click on the above graphic.
- Click on the image you want to save.
- Click on the image again until you’re seeing the image on a black background. Locate the link that says "View all sizes".
- Select the size of image you want to download.
- Download the image.

3. Writing the HTML.
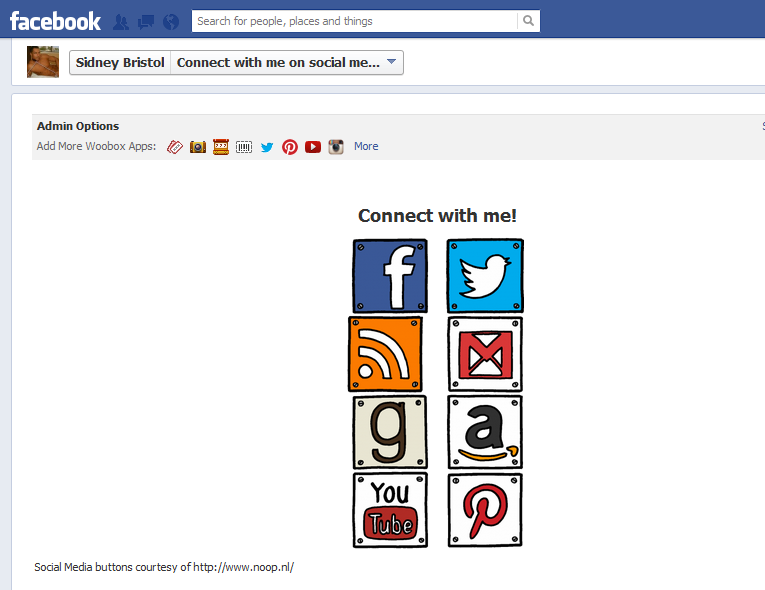
I talked about HTML editors and using your blogging platform in the Bookshelf blog. The concept for this is going to be the same. I suggest creating another page to use to update your tab without having to recreate it. You can chose how to display your links. Below is how I made mine look with the above graphics. Each image links to a social media place you can find me.
So first, create your new page for holding onto all that HTML, like what we did with the Bookshelf tab.
I chose to line my social media images up in two columns, but you can do something different. Skip the images altogether and go with text.
